Zhixing Machine Zhixing Machine

2026 Best Tips to Prevent Crimping and Cleaning Errors?

Time:2026-11-01 Author:Madeline
0%

In 2026, reliable profile corner crimping still depends on careful setup, clean tooling, and consistent checks. A frame corner may appear tight while hiding a weak joint beneath the surface. Small marks matter. Misaligned dies, incorrect pressure, or a profile seated unevenly can leave gaps, distort the corner, or damage its finish. The right settings depend on the profile system and machine, so follow the equipment and material specifications rather than guessing.

This guide explains How to prevent errors in profile corner crimping and cleaning, with practical checks for everyday workshop conditions. Before production, inspect the dies for wear and confirm they match the profile. Test one offcut, then check the joint, corner dimensions, and visible surfaces. Keep chips and dust away from contact areas; even a small aluminum shaving can affect seating. Use cleaning products approved for the profile’s finish, and wipe residue with a suitable lint-free cloth. It is easy to rush this step. That is preventable.

A neat-looking sample is useful, but it is not proof that every corner will match. Recheck the setup after tool changes, unusual profiles, or inconsistent results. Record adjustments and defects so another operator can repeat the process. Some checks take extra time, and experience does not make anyone immune to mistakes. The aim is not a perfect-looking routine; it is a process that catches problems before finished frames leave the bench.
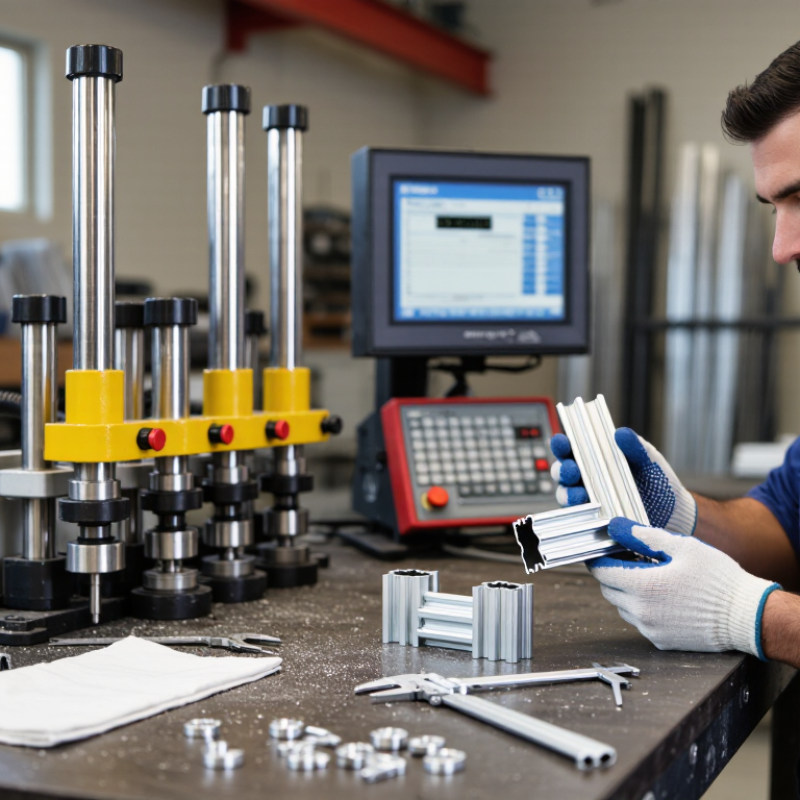
2026 Best Tips to Prevent Crimping and Cleaning Errors?

Understanding Common Crimping and Cleaning Errors

Crimping errors often begin before the tool closes. A terminal may look correct but still have a loose grip if its size does not match the wire. Stripping too much insulation can expose bare conductor beyond the barrel. Stripping too little may leave insulation trapped in the crimp. Both faults can weaken the connection. A crooked crimp or cut wire strands are warning signs, not cosmetic flaws. Check the terminal and tool specifications before starting.

Tips: Use a wire stop or measured strip length. Seat the conductor fully. Keep the terminal straight in the die. After crimping, inspect the barrel and gently tug the wire. One quick glance is not enough.

Cleaning mistakes can undo careful assembly. Lint, oil, or metal particles may remain around contact surfaces, especially after cutting or filing nearby parts. Avoid flooding a connector with cleaner; liquid can carry debris deeper or linger inside. Use a clean, lint-free swab and only a cleaning method approved for the material. Let parts dry completely before inspection or use. I would also recheck the area under good light; I have found that a rushed visual check misses small strands. That extra pause can prevent a frustrating repeat.

Choosing Suitable Tools, Materials, and Cleaning Agents

A reliable crimp starts with a tool matched to the terminal and wire size. Check the die markings rather than guessing by appearance. A loose crimp may pull free; an oversized die can flatten strands or crack the terminal. Keep the tool clean and inspect its jaws for wear. Small details matter. For repeat work, test a sample connection with a gentle pull before continuing. If the crimp looks uneven, stop and check the setup instead of squeezing it again.

Materials need to suit the working environment. Use wire insulation that tolerates expected heat and moisture, and avoid mixing metals unless the connector is designed for them. Strip only the length specified for the terminal. Nicked strands can weaken a connection, even when the outside looks neat. Cleaning agents deserve equal care. Choose one compatible with the connector, insulation, and nearby surfaces; a strong solvent may soften plastic or leave residue. Apply it to a lint-free cloth, not directly into a small assembly, and let everything dry fully before crimping. I have found that “clean enough” can be misleading: dust often hides in the tool’s hinge. Check there too. A quick wipe is useful, though it is not a substitute for inspecting the finished joint.

Preparing Work Areas and Components Before Starting

Before crimping begins, prepare the bench like a controlled process, not a storage surface. Remove loose wire strands, oil, and dust; even a small shaving can interfere with terminal seating. Keep wire, terminals, and tooling separated by job, and check part numbers against the work instruction. Inspect insulation for nicks and terminals for bent wings or contamination under bright, even lighting. Confirm the crimp tool is clean, undamaged, and within its calibration period. Small details matter. It is easy to assume a familiar setup is still correct; that assumption deserves a quick check.

The U.S. Bureau of Labor Statistics reported

about 2.6 million nonfatal workplace injury and illness cases in private industry in its 2023 Survey of Occupational Injuries and Illnesses.

This figure does not measure crimping defects, but it underscores the value of clear, orderly work areas. Keep walkways and tool handles unobstructed, and place a labeled scrap container within reach. Before production, crimp a sample using the actual wire and terminal combination. Inspect the conductor brush, insulation support, and bell-mouth against the applicable work standard, then record the result. If the sample looks acceptable only from one angle, pause and inspect again. A rushed setup check can miss a real defect.

Applying Reliable Crimping and Cleaning Procedures

Reliable crimping starts before the tool closes. Match the terminal, wire gauge, and die specified for the connection. A mismatch can leave strands loose or crush the barrel. Strip only the required length, and keep stray copper outside the terminal. Keep the conductor straight. Small details matter.

Use a maintained ratcheting crimper, with its jaws seated squarely on the terminal. Complete the full cycle rather than releasing early. Inspect the crimp for cracks, uneven compression, or exposed strands. Give the wire a firm, controlled pull; if it moves, remake the connection. A clean-looking crimp can still fail this check. It is tempting to skip inspection when the first result looks neat, but that shortcut is hard to defend.

Keep the work surface and tools free of oil, dust, and wire scraps. Wipe them with a lint-free cloth, using only a cleaner approved for the materials involved. Let parts dry fully before assembly. After crimping, check the connection and surrounding area for residue or loose fibers. Avoid flooding the joint with cleaner. Do not rush. A quick final look may catch debris, though it cannot replace checking the crimp itself.

Inspecting Results and Correcting Process Errors

After crimping, inspect the contact under bright, angled light before cleaning removes useful evidence. Look for uneven compression, cracked insulation, stray strands, or a terminal that sits crooked. Check crimp height with a calibrated measuring tool and compare it with the terminal specification. A neat appearance is not proof of a sound connection. Small clues matter.

Cleaning can create its own defects. Use a lint-free cloth and only a cleaning method approved for the materials involved. Avoid scraping plated surfaces or pushing debris into the crimp barrel. Check for fibers, residue, and moisture under magnification, especially around narrow gaps. Do not guess. If a cleaner leaves a film or softens insulation, stop and verify compatibility before continuing.

When a result fails inspection, set the affected pieces aside and record the defect, tool setting, and measured crimp height. Then check the applicator, wire position, and terminal alignment. Change one variable at a time; changing several makes the cause harder to identify. Repeat the measurement and any required pull test using the applicable work specification. It is tempting to accept a joint that looks nearly right. That shortcut can hide a repeatable setup problem, and visual inspection alone cannot catch every fault.

FAQS

What are common signs of a poor crimp?

Look for a crooked barrel, cut wire strands, or exposed conductor beyond the terminal. A gentle tug can reveal a loose grip.

How much insulation should I strip from a wire?

Use the specified strip length or a wire stop. Too much exposes conductor; too little traps insulation inside the crimp.

How can I keep the conductor seated correctly?

Insert it fully into the barrel and keep the terminal straight in the tool die. Check the position before crimping.

What should I inspect before starting work?

Check the wire insulation for nicks and terminals for bent wings or contamination. Small details count.

How should I prepare the workbench?

Remove loose strands, oil, and dust. Keep parts organized, and place a labeled scrap container within reach.

How do I clean contact areas safely?

Use a clean, lint-free swab and a method approved for the material. Avoid flooding the connector; liquid can carry debris inside.

How can I check whether a crimp tool is ready?

Confirm it is clean, undamaged, and within its calibration period. A familiar setup can still be wrong.

Why crimp a sample before production?

Use the actual wire and terminal, then inspect the conductor brush, insulation support, and bell-mouth against the work standard. Check from more than one angle. I sometimes rush this part.

Conclusion

Preventing crimping and cleaning errors starts with understanding what can go wrong, such as uneven pressure, poorly aligned components, residue, or contamination. Choose tools that match the profile and task, and use suitable materials and cleaning agents. Before work begins, organize the work area, check that components are clean and undamaged, and confirm that tools are in good condition.

For reliable results, follow consistent crimping and cleaning procedures, applying even pressure and avoiding rushed or inconsistent steps. Inspect finished corners and surfaces for secure joints, uniform appearance, and remaining dirt or residue. If an inspection reveals a problem, identify its cause, correct the process, and check the result again. These practical steps explain How to prevent errors in profile corner crimping and cleaning while supporting dependable, repeatable workmanship.

Madeline

Madeline

Madeline is a dedicated marketing professional with a wealth of expertise in our company's core offerings. With a keen understanding of the industry, she brings a unique perspective to her role, consistently delivering high-quality content that highlights the superior aspects of our products. As......