 Zhixing Machine
Zhixing Machine
Zhixing Machine
How to Extend the Service Life of Cutting Saw Blades and Tools begins with one practical truth: tool wear rarely comes from one mistake. Cutting speed, feed pressure, material hardness, coolant flow, machine alignment, and operator habits all interact. A blade may look usable while microscopic cracks already weaken its teeth. A carbide tool may fail after one overheated cut. Small signals matter.
Machining researcher and author Dr. Tony L. Schmitz offers a useful principle: “Tool life is a system outcome, not a tool-only problem.” This perspective helps maintenance teams inspect the complete cutting process. Check blade tension before production. Confirm the correct tooth pitch for the material. Remove chips from the gullets. Watch for vibration, burning marks, unusual noise, or uneven tooth wear. These details often reveal trouble earlier than a final breakage.
This guide explains How to extend the service life of cutting saw blades and tools through measurable, practical steps. It covers setup accuracy, proper cutting parameters, lubrication, cleaning, storage, and timely replacement. Experience shows that operators sometimes push a blade too far. I have seen a slightly dull blade create heat, vibration, and poor surface quality within minutes. That decision saves one blade, perhaps, but wastes material and machine time. Not every failure is preventable. However, disciplined inspection can reduce avoidable damage and improve consistency. The recommendations should be tested against each machine, material, and manufacturer’s specifications.
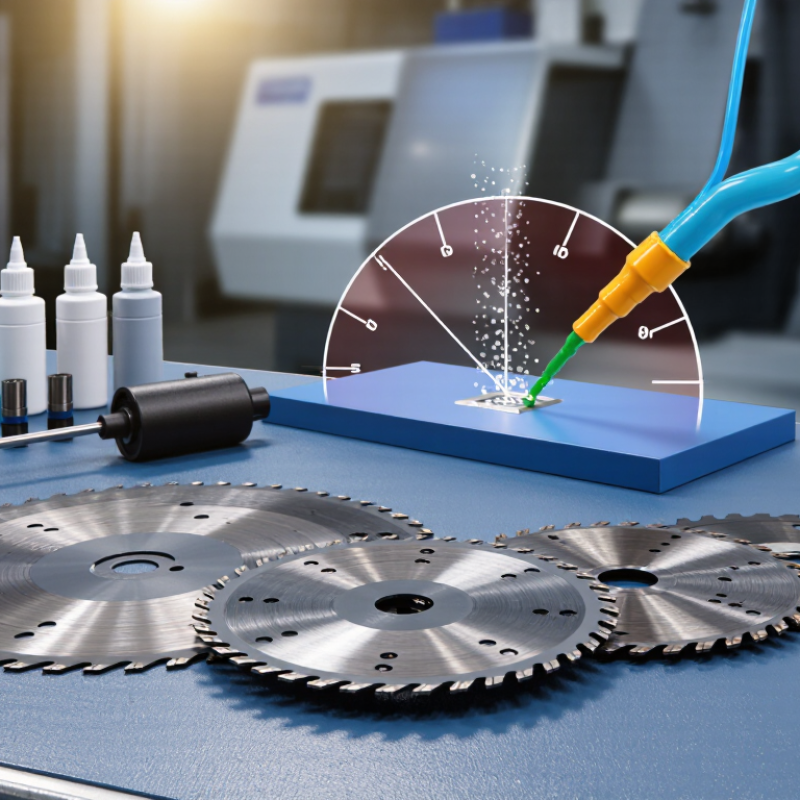
How to Extend the Life of Cutting Saw Blades and Tools?
Heat is a quiet blade killer. Excessive friction softens cutting edges and can weaken the tool body. Dull blades create more heat, so wear accelerates quickly. Incorrect tooth selection also shortens service life. A fine-tooth blade may struggle in thick material, while a coarse blade can tear thin stock. Forced feeding causes similar damage. The cut should feel steady, not aggressive.
Contamination matters too. Dust, resin, metal chips, and poor lubrication can block tooth clearance. I have seen operators blame the blade after cutting with a misaligned guide. The blade looked damaged, but the setup caused uneven loading. Vibration leaves visible marks along the cut. It may also loosen fasteners and damage bearings. Storage is often overlooked. Dropping a blade onto a concrete floor can create tiny cracks that later spread. I once stored tools too tightly and learned that clean, dry separation matters.
Tips: Check alignment before cutting. Use the correct speed, feed pressure, and tooth pattern for the material. Let the tool do the cutting. Clear chips regularly, and inspect teeth under good light. Replace damaged blades instead of stretching their use. Keep cutting edges covered during storage. Record unusual noise, heat, or vibration; these details help reveal problems early. A simple maintenance log is useful, though I did not always keep one consistently. That was a mistake.
| Life-Shortening Factor | Typical Impact on Tool Life | How It Causes Damage | Common Warning Signs | Recommended Preventive Action | Practical Control Check |
|---|---|---|---|---|---|
| Incorrect cutting speed | High | Excessive speed can generate heat and accelerate abrasive wear, while insufficient speed may increase cutting forces and encourage tooth chipping. | Discoloration, premature dulling, smoke, or unusually high cutting resistance. | Set surface speed according to the blade material, tooth geometry, workpiece material, and manufacturer-approved operating range. | Verify spindle or band speed before each material change and record abnormal heat or cutting noise. |
| Excessive feed rate or feed pressure | High | High loading bends or chips teeth, increases vibration, and can overload the saw drive and arbor system. | Broken teeth, rough cuts, motor overload, or a sudden drop in cutting speed. | Use a steady feed that matches the material hardness, blade pitch, tooth strength, and machine capacity. | Reduce feed pressure when the machine stalls, vibrates, or produces irregular tooth marks. |
| Wrong tooth pitch or tool geometry | High | Teeth that are too coarse or too fine for the workpiece can overload individual teeth, clog with chips, or cause premature wear. | Tooth stripping, gullets packed with chips, uneven wear, or poor surface finish. | Select tooth pitch and rake geometry so that several teeth engage the material without allowing chip packing. | Match the blade to the workpiece thickness; avoid using a tooth pattern designed for a different material or section size. |
| Insufficient coolant or lubrication | High | Cooling and lubrication reduce friction, carry chips away, and limit thermal damage to the cutting edge. | Heat tint, built-up edge, sticky chips, rapid edge rounding, or shortened cutting intervals. | Use a suitable coolant or cutting fluid at adequate flow and concentration for the material and operation. | Check fluid level, concentration, nozzle direction, and delivery to the actual cutting zone. |
| Chip buildup and inadequate chip removal | High | Accumulated chips rub against the blade, obstruct gullets, increase friction, and may recut previously removed material. | Gullet loading, rising cutting temperature, scratches on the workpiece, or irregular tooth wear. | Use the correct tooth pitch, coolant flow, chip brush, air blast, or cleaning method for the application. | Inspect gullets and chip channels during tool changes and remove compacted chips before restarting. |
| Workpiece vibration or inadequate clamping | High | Movement causes intermittent tooth loading, impact, chatter, and uneven wear across the blade. | Chatter marks, noisy cutting, tooth fracture, inaccurate dimensions, or a wandering cut. | Clamp the workpiece close to the cutting zone and support long, thin, or flexible sections. | Check vise pressure, support spacing, workpiece movement, and blade tension before cutting. |
| Blade misalignment or incorrect tension | High | Misalignment causes side loading and uneven tooth engagement; incorrect tension can promote vibration, deflection, or fatigue. | One-sided tooth wear, wandering cuts, blade cracking, or inconsistent kerf width. | Align guides, wheels, arbor, and vise; apply tension within the machine and blade specifications. | Use a straightedge or alignment gauge and inspect guide bearings for correct adjustment. |
| Cutting contaminated or abrasive material | High | Sand, scale, dirt, hard inclusions, and surface-hardened layers abrade or impact the cutting edges. | Rapid edge wear, isolated tooth damage, sparks, or inconsistent tool life between similar parts. | Remove heavy scale or contamination when practical and choose a tooth grade and geometry suited to abrasive conditions. | Inspect incoming material surfaces and separate contaminated stock from clean stock when setting parameters. |
| Cutting hardened or work-hardened material | High | Excessive rubbing or dwelling can harden some metals further, increasing cutting forces and accelerating edge wear. | Rapid dulling, squealing, increased heat, and a polished area where the tool has rubbed without cutting. | Maintain a positive, continuous cut; avoid stopping or rubbing in the cut, and use suitable tooling and coolant. | Keep feed consistent and replace or recondition tools before they begin rubbing rather than cutting. |
| Starting the cut with damaged or missing teeth | Medium to High | Missing teeth change the load distribution and can make adjacent teeth absorb excessive impact. | Progressive tooth loss, vibration, uneven kerf, or sudden blade failure. | Inspect the blade before use and replace or professionally repair it when tooth damage exceeds allowable limits. | Check the full tooth line, not only the section visible near the machine guides. |
| Improper break-in of a new blade | Medium | Applying full feed immediately can damage sharp new tooth edges before they develop a stable wear pattern. | Early tooth chipping, unstable cutting, or shorter-than-expected initial tool life. | Run a new blade at a reduced feed and, where appropriate, reduced speed for the initial cutting period. | Increase operating load gradually while monitoring vibration, sound, chips, and cut quality. |
| Operating with worn guides, bearings, or pulleys | Medium to High | Worn machine components allow blade movement, side loading, and vibration that damage teeth and reduce accuracy. | Blade flutter, uneven tracking, recurring breakage, or repeated alignment problems. | Inspect and replace worn guides, bearings, wheels, pulleys, and drive components according to maintenance requirements. | Perform a machine-condition check whenever a new blade shows abnormal wear unusually early. |
| Poor tool storage and handling | Medium | Moisture, impact, bending, and contact between cutting edges can cause corrosion, deformation, or edge damage before use. | Rust spots, bent blades, chipped inserts, damaged packaging, or runout during rotation. | Store tools dry and supported, protect cutting edges, and avoid dropping or stacking them without separators. | Inspect tools for corrosion, cracks, distortion, and damaged teeth before installation. |
| Incorrect tool runout or arbor cleanliness | Medium | Dirt, burrs, or excessive runout make the tool rotate eccentrically and distribute cutting forces unevenly. | Uneven tooth wear, dimensional variation, vibration, or visible wobble. | Clean mating surfaces, remove burrs safely, tighten according to procedure, and verify runout when accuracy is critical. | Inspect the arbor, flange, chuck, and mounting surfaces at every tool change. |
| Failure to remove the blade after reaching end of life | Medium | A severely worn tool requires greater force and heat, increasing the risk of poor cuts, tooth breakage, and machine overload. | Longer cycle time, increased noise, poor finish, higher power demand, or repeated adjustment of cutting parameters. | Define replacement or resharpening limits using cut quality, force, wear pattern, and safety condition. | Track cuts, operating hours, or material volume together with inspection results to identify trends. |
| Excessive heat cycling and intermittent cutting | Medium | Repeated heating and cooling can contribute to thermal stress, distortion, and loss of cutting-edge hardness. | Cracks, discoloration, distortion, or a noticeable change in tooth hardness and wear behavior. | Use consistent coolant delivery and avoid unnecessary pauses while the blade is engaged in the workpiece. | Inspect for thermal damage after difficult cuts and correct the cause before continuing production. |
| Excessive side pressure or forced turning | High | Side loading deflects the blade or tool, increases friction, and can fracture teeth or cutting inserts. | Side wear, angled cuts, tooth breakage, blade bending, or marks on the kerf walls. | Allow the tool to cut in its intended direction and never force a blade sideways to correct a wandering cut. | Stop the operation and correct alignment, clamping, feed, or tool condition instead of applying additional pressure. |
| Inadequate cleaning after use | Low to Medium | Residual chips, coolant, and corrosive contaminants can promote rust, clogging, and damage during storage. | Surface corrosion, hardened deposits, blocked gullets, or poor performance on the next use. | Clean, dry, and lightly protect the tool using a method compatible with the tool material and storage conditions. | Complete a post-use inspection and record any abnormal wear before returning the tool to storage. |
Practical guidance: Actual tool life depends on blade construction, tooth material, workpiece composition, machine condition, coolant, cutting parameters, and operator technique. Always confirm operating limits and safety procedures for the specific tool and machine.
Inspect it under bright light. Look for chipped teeth, uneven wear, resin buildup, and a distorted body.
A small burr can strike fresh teeth within seconds. Remove burrs, clean the material, and clamp it firmly.
Check arbor alignment, clean flanges, guard position, and coolant flow. Even slight runout causes repeated impact.
It reveals vibration, poor clamping, and rough edges quickly. Visual inspection cannot show every problem.
Match speed with blade diameter, tooth pitch, and material hardness. Reduce speed when teeth discolor or squeal.
Teeth may bend or wear unevenly. The motor also becomes overloaded. Let the teeth cut.
Aim a steady fluid stream at the cutting zone. Check concentration, filtration, and nozzle condition regularly.
No. Some materials cut better dry, while heat-sensitive alloys need controlled lubrication. More fluid can still hide poor settings.
Record installation dates, cutting hours, speed, pressure, material, and coolant condition. Change one variable at a time.
Operators often blame the blade too quickly. Misalignment, dull teeth, and weak clamping may be the real causes.
How to extend the service life of cutting saw blades and tools begins with understanding the conditions that cause premature wear, such as selecting an unsuitable blade, excessive pressure, incorrect cutting speed, poor alignment, and insufficient cooling. Each material requires a tool with the appropriate tooth design, hardness, geometry, and cutting capacity. Before operation, inspect the blade, machine, and workpiece, remove debris, confirm secure installation, and ensure the material is properly supported and aligned.
During cutting, use steady pressure and suitable speed rather than forcing the tool through the material. Apply the correct cooling or lubrication method when needed to control heat and reduce friction. After use, clean the blade and tool carefully, check for worn, cracked, or damaged parts, and sharpen or replace components when their performance declines. Proper storage in a dry, protected location prevents corrosion and accidental damage. Consistent preparation, operation, maintenance, and inspection can improve cutting accuracy, reduce downtime, and significantly extend tool performance.
